Let's talk about how to make Smough's Hammer. We are going to break this down into simple steps. We will cover materials and tools.
Understanding Smough's Hammer
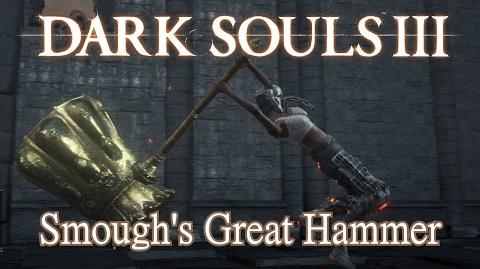
Smough's Hammer is a fictional weapon. It comes from the video game Dark Souls. It's huge and iconic. It’s associated with the character Executioner Smough.
This project will focus on creating a replica. The replica will be for cosplay or display. We are not making a real, functional hammer. Safety is important. Consider the weight and balance.
Materials You'll Need
First, we need to gather our materials. Think about what a massive hammer would be made of. For a prop, we can use lighter things.
Core Materials
The core of the hammer gives it shape. Consider these choices: Foam insulation boards are lightweight and easy to shape. PVC pipe can form the handle. It's strong and easy to work with. Wood provides a solid core, but is heavier. Choose the most suitable option based on your skills and resources.
Foam insulation boards are large, flat pieces of foam. You can cut and stack them. This will give you a block to carve. PVC pipe is plastic tubing. It's common for plumbing. Wood comes in different sizes and shapes.
Outer Layer Materials
The outer layer adds detail and durability. EVA foam is a popular choice. It's flexible and easy to cut. Worbla is a thermoplastic. It's moldable when heated. Cardboard can be used for details. Remember to reinforce it.
EVA foam is a soft, rubbery foam. You can find it in craft stores. Worbla needs to be heated. When it's hot, you can shape it. When it cools, it becomes hard. Cardboard is cheap and easy to get. But it's not very strong.
Finishing Materials
These materials give the hammer its final look. Primer prepares the surface for paint. Acrylic paints provide color. Clear coat protects the paint. Sealant prevents moisture damage.
Primer helps the paint stick. Acrylic paints are water-based. They're easy to clean up. Clear coat adds a shiny or matte finish. Sealant prevents water from soaking into the foam or cardboard.
Tools You'll Need
Now, let's get the tools ready. Safety gear is essential. Protect your eyes and hands.
Cutting Tools
You need tools to cut the materials. Craft knives are great for fine details. Utility knives are good for thicker materials. Saws (like a coping saw) are for wood or PVC pipe. Hot wire foam cutter can be used to cut insulation foam quickly.
A craft knife is small and sharp. A utility knife has a retractable blade. A coping saw is a hand saw with a thin blade. It's used for curves. A hot wire foam cutter uses a hot wire to melt the foam.
Shaping Tools
These tools shape the hammer's form. Sandpaper smooths surfaces. Files shape edges. Heat gun molds Worbla. A Dremel tool can carve details into foam and wood.
Sandpaper comes in different grits. A higher grit is finer. Files are used to remove small amounts of material. A heat gun blows hot air. A Dremel tool is a rotary tool. It can cut, grind, and sand.
Assembly Tools
These tools help you put everything together. Glue gun adheres materials quickly. Epoxy creates a strong bond. Screws provide extra reinforcement. Clamps hold pieces together while glue dries.
A glue gun uses hot melt adhesive. Epoxy is a two-part glue. It's very strong. Screws are used with a screwdriver. Clamps hold things tight.
Safety Gear
Protect yourself! Safety glasses protect your eyes. Gloves protect your hands. Respirator protects your lungs. Work in a well-ventilated area.
Safety glasses prevent debris from getting in your eyes. Gloves prevent cuts and burns. A respirator filters out dust and fumes.
Step-by-Step Construction
Now, let's build the hammer. Take your time. Be careful.
Creating the Core
Shape the core of the hammer. If using foam boards, stack and glue them together. Cut the basic shape with a utility knife. If using PVC pipe, cut it to the desired handle length. If using wood, carve or shape it to form the central structure of the hammer head.
Make sure the core is strong. This will support the outer layers. A weak core will lead to a fragile hammer.
Adding the Outer Layer
Apply the outer layer. Cut EVA foam or Worbla into the desired shapes. Heat Worbla and mold it around the core. Glue EVA foam onto the core. Create details with extra foam or cardboard pieces. Remember to follow the reference images of Smough's Hammer.
The outer layer defines the hammer's appearance. Take your time to get the details right. Use reference images to guide you.
Finishing and Painting
Prepare the surface for paint. Apply primer to the entire hammer. Sand any rough spots. Paint the hammer with acrylic paints. Use different colors and techniques to create a realistic look. Apply a clear coat to protect the paint. Let everything dry completely. Remember to add the distinctive details found in Smough's Hammer.
Painting is the final touch. It brings the hammer to life. Don't rush this step. Use multiple coats of paint.
Adding Details
Add the final details. This could include weathering effects. Use dry brushing techniques to create a worn look. Add texture with paint or glue. Consider adding Smough's signature emblem.
Details make the hammer unique. Look closely at the reference images. Pay attention to small details.
Final Thoughts
Making Smough's Hammer is a fun project. It requires patience and skill. Be safe. Have fun.
Remember to research and plan. This will help you avoid mistakes. Take breaks. Don't get discouraged.
Enjoy your finished Smough's Hammer! You made it yourself. That's awesome!